
Events are the heartbeat of your club — practices, tournaments, lessons, whatever your schedule looks like. Once an event exists, you can publish it for members to RSVP, and later record attendance against it. This guide gets your first event published.
Before you start
Have these ready:
- A name for the event (“Saturday Open Practice” works fine)
- A date and start time
- A location, or a note that it’s online
New clubs start with two seeded event types — Meetup for practices and casual play, Tournament for rated or competitive events. Running something different? A workshop, a study group, a junior camp — jump to Customizing event types first to add the type your event needs, then come back here.
Step 1: Fill out the create event form
Head to Events → New Event (or the quick action on the dashboard). The form is organized into sections.
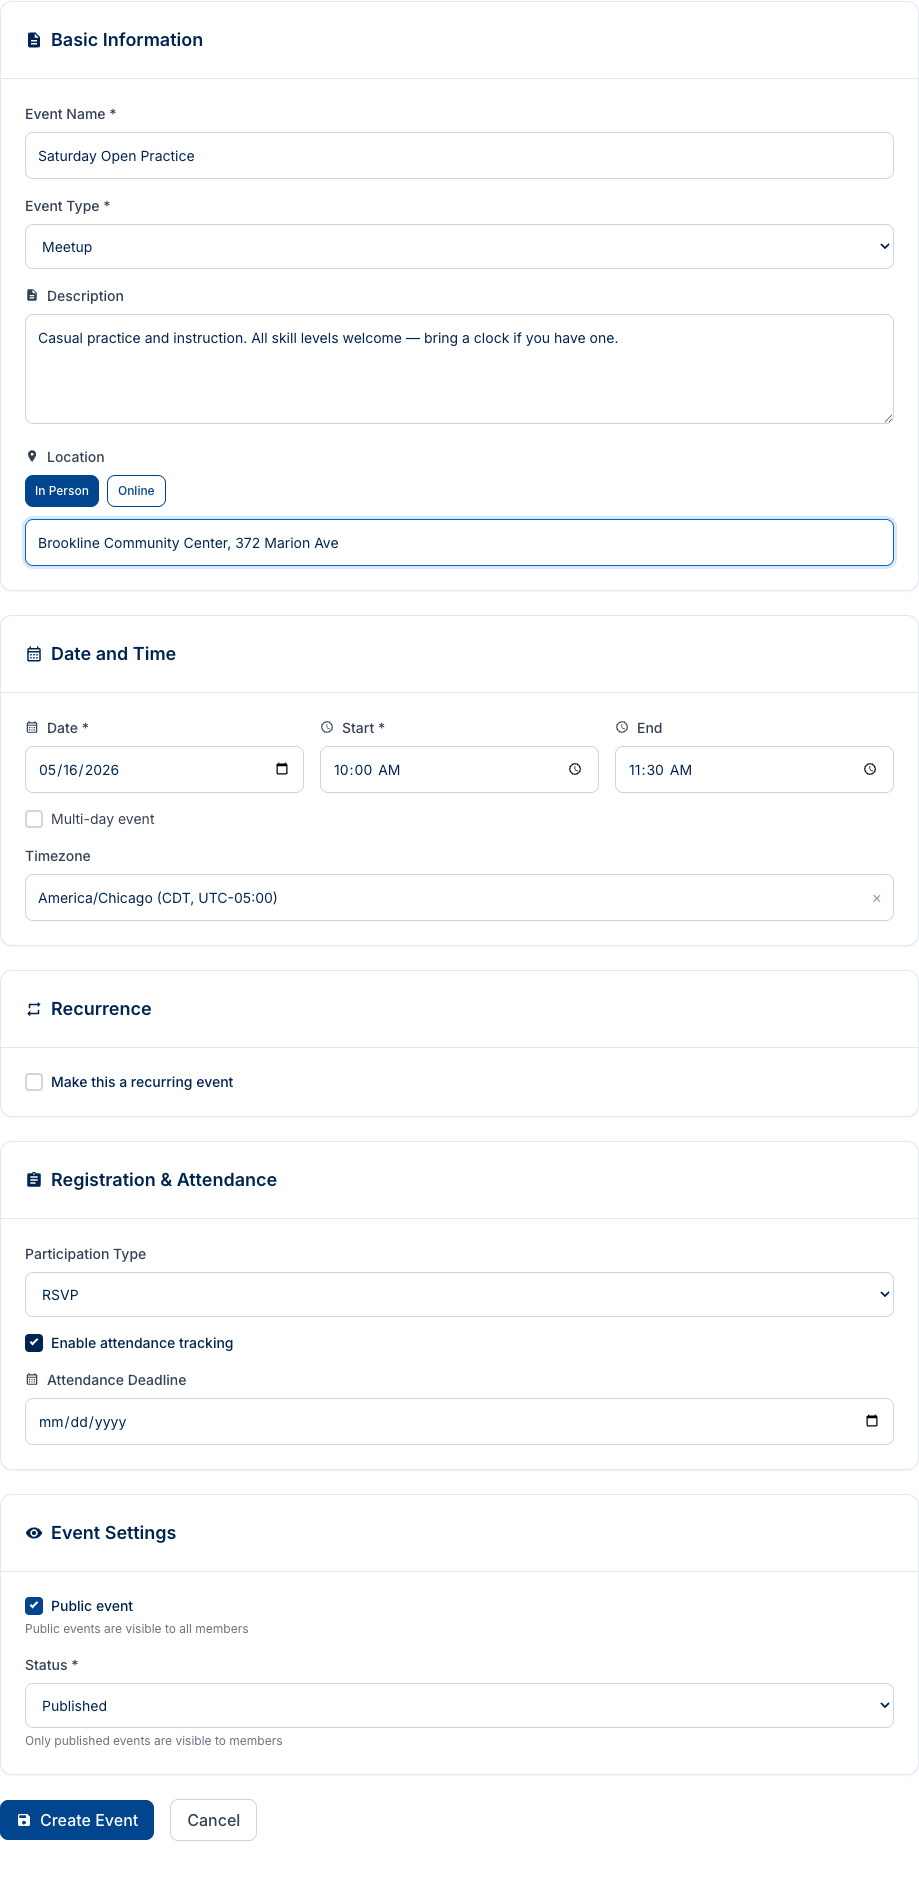
Basic Information — Give the event a name and pick a type from the dropdown. Meetup is selected by default — use it for practices, lessons, casual play, and anything informal. Tournament is for rated or competitive events. Add an optional description, then choose the location format. The Location toggle is In Person or Online; choosing In Person reveals a text field for the venue name or address.
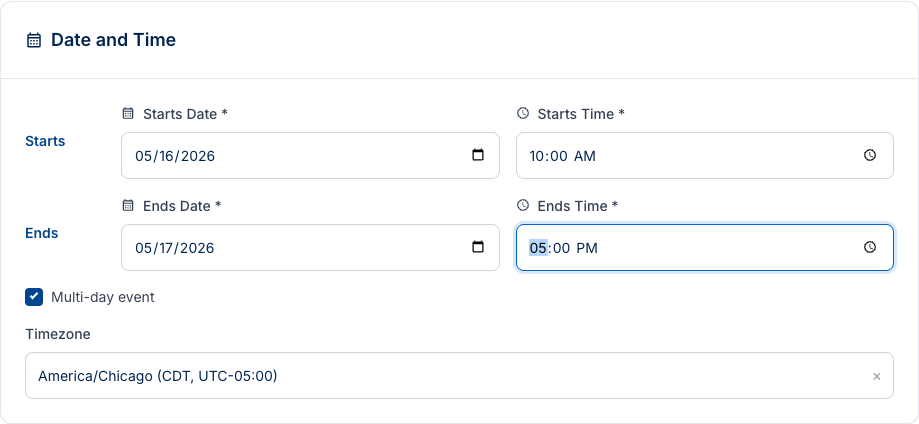
Date and Time — Pick a date, then a start time. The end time auto-fills to 90 minutes after start — adjust it if your event runs longer or shorter. The timezone defaults to your club’s setting. For events that span multiple days (tournaments, camps), tick Multi-day event to reveal paired Starts and Ends rows so you can set separate end-date and end-time.
Recurrence — If you’re on the Pawn plan, this section shows a disabled “Make this a recurring event” toggle.
Registration & Attendance — Two independent controls here.
Participation Type sets how members respond to the event:
- No participation tracking — the event is visible but there are no RSVP or registration buttons.
- RSVP — members see Yes / Maybe / No buttons on the event detail page. Best for practices and casual events.
- Registration — a fuller registration flow, suited for tournaments or events with limited spots.
Enable attendance tracking is a separate toggle. When switched on, an Attendance Deadline date field appears. Enabling this is what surfaces per-member Present / Absent / Late / Excused controls on the event detail page — which is exactly what the Recording Attendance guide covers next.
Event Settings — A Public event toggle and a Status dropdown (Draft / Published / Cancelled). Status defaults to Draft.
Step 2: Publish
Status is how you publish. Change the dropdown from Draft to Published, then click Create Event. Only published events are visible to members — the helper text under the field says exactly that.
You can always come back from the event detail page to edit the status, the description, or anything else. Nothing is permanent at creation time.
What members will see
Once published, members land on the event detail page when they tap or click the event.
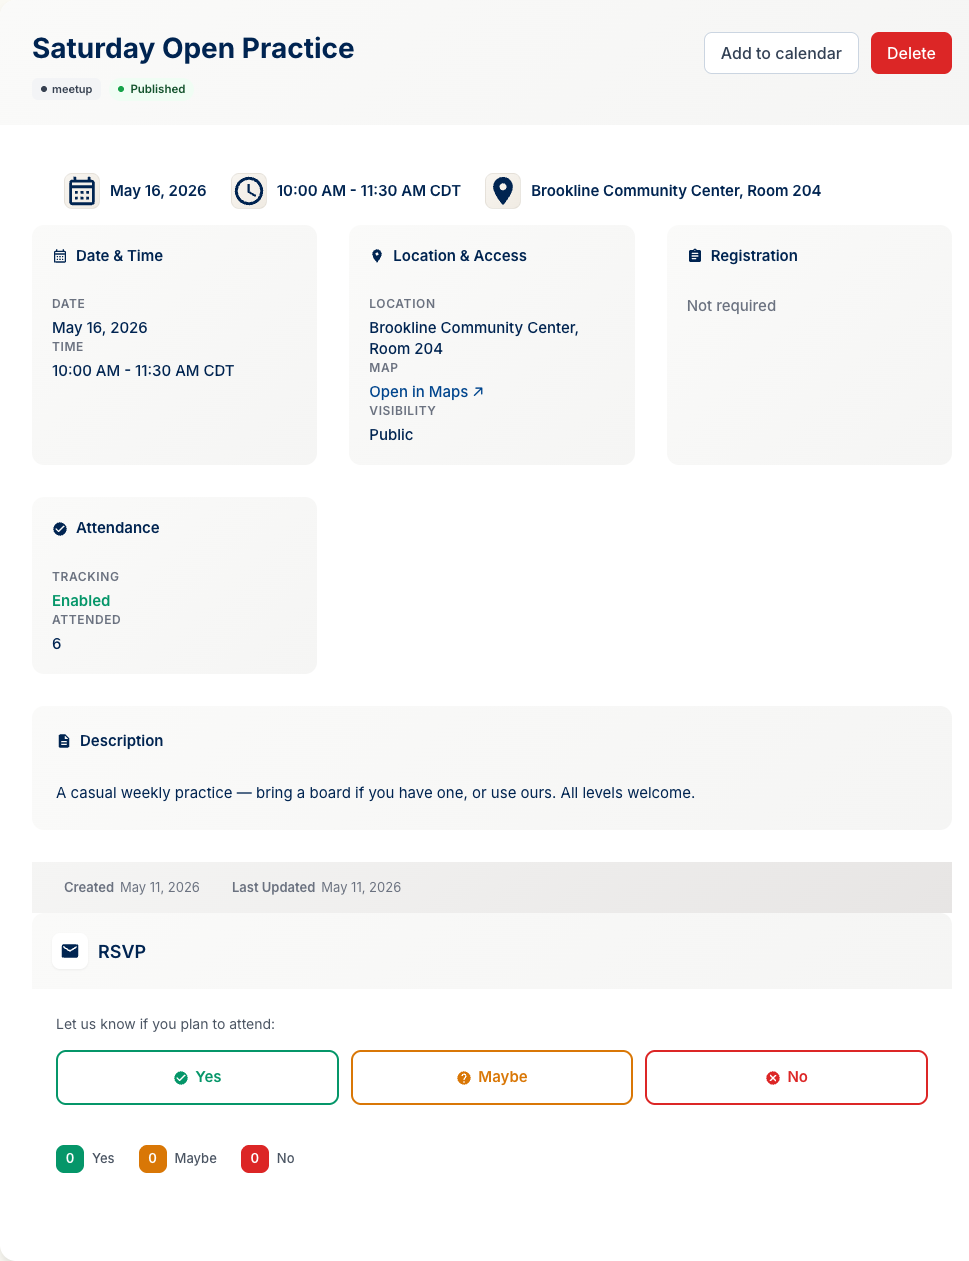
The page shows the event name, its type badge (color-coded), and status badge at the top, followed by summary cards for date/time and location. If RSVP is enabled, members see Yes / Maybe / No buttons with a running tally. The attendance section at the bottom — with per-member Present / Absent / Late / Excused controls — is covered step by step in the Recording Attendance guide.
Find it again later
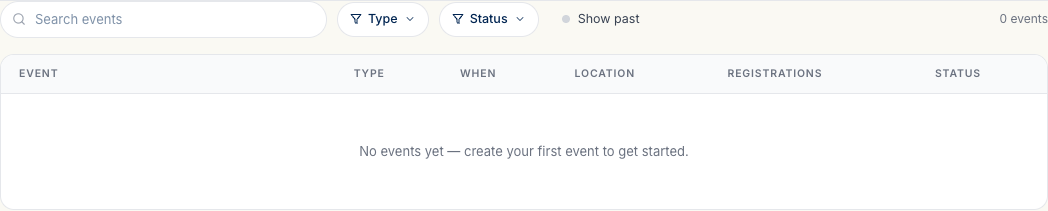
Head to Events any time to see your list.

The Type and Status filters at the top of the list let you find specific events quickly. The status badge (“Published”, “Draft”) is visible inline so you don’t have to open each event to know what members can see.
Customizing event types
The two seeded types (Meetup, Tournament) cover most clubs. If they don’t fit yours — say you’d rather call it “Practice” and “Rated Game”, or you want separate “Lesson” and “Workshop” types — open Settings → Event Types.
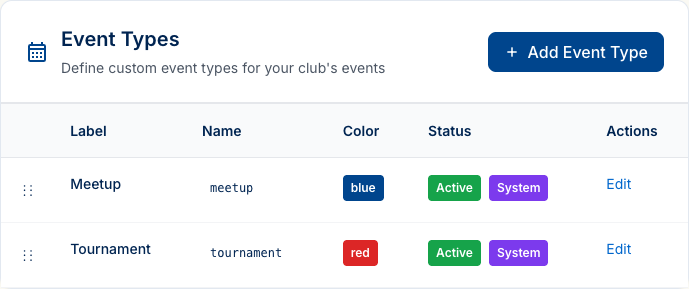
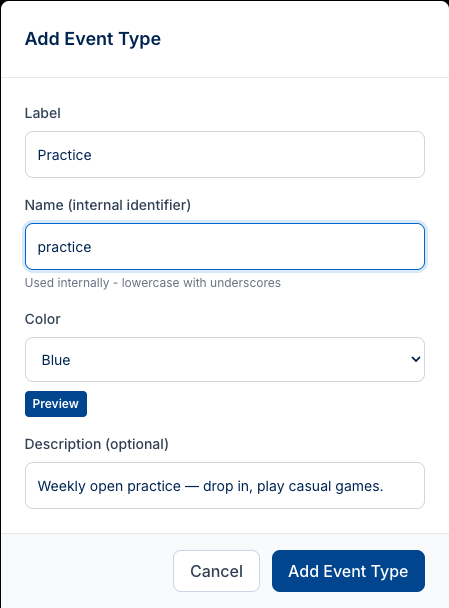
Click Edit on a row to rename it, or Add Event Type for a new one. The new-type form has four fields:
- Label — the display name your members see (e.g. “Lesson”)
- Name — an internal identifier in lowercase with underscores. Rook fills this in as you type the label; adjust it if needed.
- Color — choose from Blue, Green, Red, Orange, Purple, Yellow, Gray, or Cyan. This colors the badge on the event detail page and in the events list.
- Description — optional, for your own reference.
What’s next
With an event published, the natural next step is recording who showed up:
- Record attendance for this event — use the four-state Present / Absent / Late / Excused workflow to track participation.
If you haven’t built your roster yet, start there first:
- Add your members — manual entry, CSV import, or invitations.
If you get stuck, the FAQ has answers to the most common questions, and you can always email support@rookready.com.
Updated May 12, 2026